Wednesday 21 December 2011

Commission - Lucy


Medium: Acrylic
Paper: Arista Stretched canvas
Size: 24″ × 18"
Duration: Approximately 10-12 hours over two days.
This is probably the last commission I have had to complete before the year ends, I started it yesterday morning and finished it this afternoon. I’m really quite happy with the finished piece, the dog, was being mainly white and creamy and I ended up playing with really subtle creams, blues and greys to even begin to show the white curly fur.
The background also kept busy for a while, but thank heavens for masking tape! Once I masked out portions of the seat sides, it was really fairly easy to fill in the block strips where they were needed.

Thursday 15 December 2011

Commission - Rebecca and the Boys


Medium: Pencil
Paper: Goldline Bristol Board 220gsm
Size: A3 16.5 × 11.7 inches (420 mm x 297 mm)
Duration: 15 hours (over four days)
This is a commissions I’ve recently completed. It was of four children in pencil. This has taken me the better part of four days, but the end result was worth the slow journey. The thing I enjoyed most was the fact that in this single piece of pencil work, there were so many different texture in the composition from the outset, which included their faces, the different styles and tones of their hair styles, their slightly different skin tones and not to mention the subtle tones and texture of all of their clothing. It’s so good to get back into pencil again.

Monday 28 November 2011

Teasel the Beardie


Medium: Graphite pencil, leads, 2B, 7H, 6H, 5H and 2H

Paper: Goldline Bristol Board 220 gsm 

Size: A2 (23.4″ × 16.5″ – 594 x 420mm) 

Duration: 10 − 12 hours

This is a commission graphite sketch I've just completed (in time for someones Birthday in December 2011), of Teasel a beautiful and very energetic Beardie. The whole process has taken me between 10 − 12 hours or thereabouts over a few days. Completing this sketch was a real challenge and I think I was pushing the envelope out a bit, as there was a lot of white and grey fur in this dog, so I ended up using a lot of the higher hard pencils H4, H6 and H7 as well as the usual softer 2B. 

I also used quite a load of embossing with the embossing tools I have and even found them useful for some tufts of hair in the dogs coat (especially on the thigh and chest areas). For the subtle grass background, I again used the embossing tools and filled in the spaces delicately with a 3mm 2B lead, that required the unadulterated use of lots of patience and and then even some patience! But I'm happy with the finished effect it gives the subject.

Sunday 20 November 2011

Hey Ho! Hey Ho! It's off to Dublin I go! - 1st Trip

9.30am. Tuesday morning on the 15th November I arrived at Newcastle Airport to begin the first of eight trips to Dublin to work as a sketch artist at the 
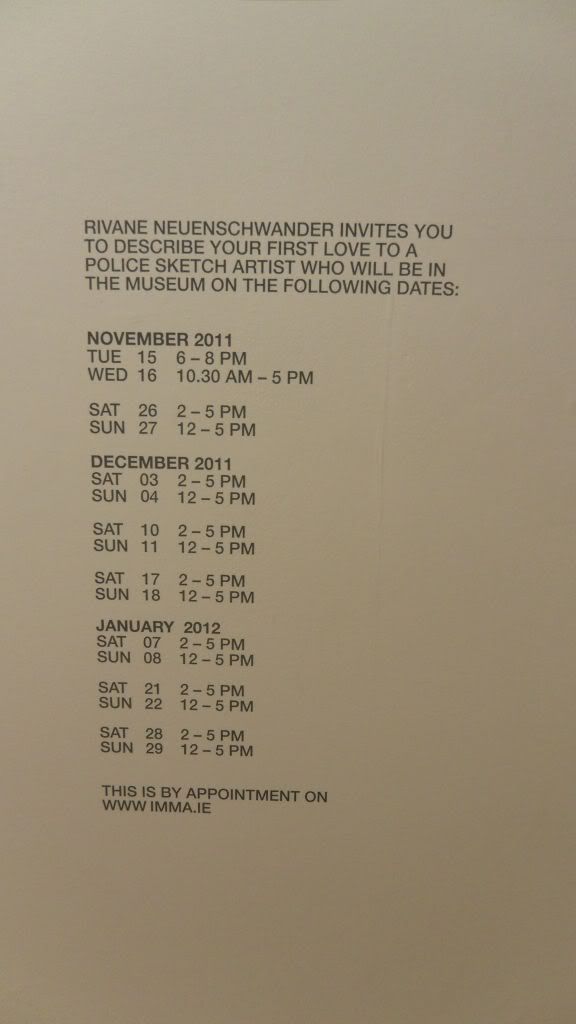
"Irish Museum of Modern Art"  "Rivane Neuenschwander’s exhibition"

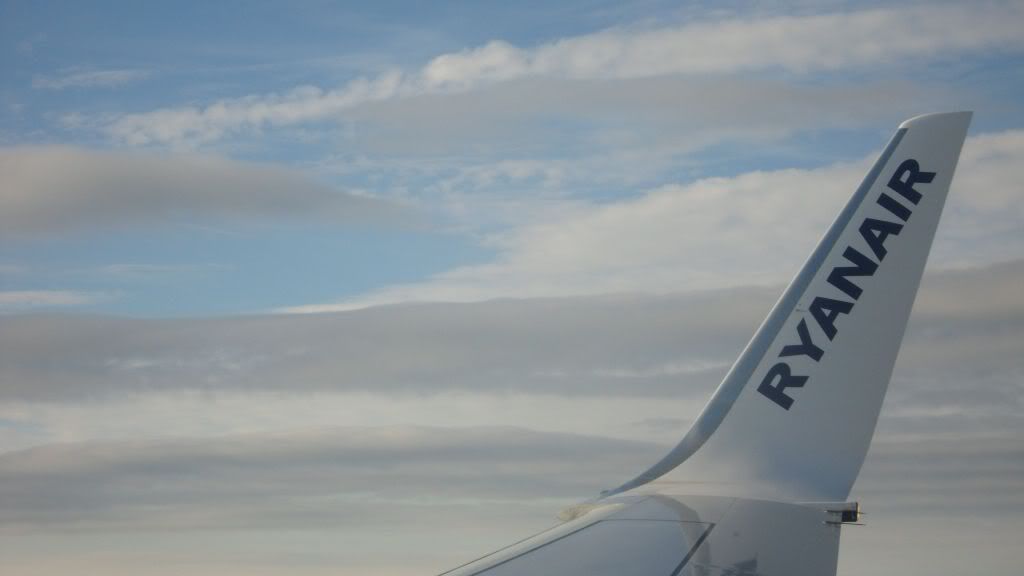
As the Museum was paying for the flight and Hotel, all I had to do was check in on-line, sounds easy right? The courier were Ryanair, and as I had already been given my flight check in reference number via email, all I had to do was go onto Ryanair's site and complete my check-in on-line, this is when the first hiccup appeared, the check-in site didn't recognise my reference number! OH My God! panic stations! I was due to fly out the very next day! and the Ryanair site had no record of my booking, a quick phone call to Ryanair themselves, quickly rectified this, the reference was correct, but I had simply used my email address instead of the booking agent's own email address DOH! (this was to be one of the many occasions that the lack of the fantastic female ability to multi-tasking had let me down). Being a man, I had read the first line of the email containing my flight reference and if I had only continued reading that email, the sender stated quite clearly that I had to enter in the booking agents email along with the flight reference.

Once I checked in successfully, I was given the option of adding a Priority Booking option for only an additional £10, with the promise of speedy journey and  most important the chance to board the plane BEFORE the general rabble of mere ordinary passengers. I hovered over the "Click to apply now" button, but common sense got the better of me, they were paying for the flight, so why should I pay extra? This wasn't supposed to cost me anything right?

Well after arriving at Newcastle Airport, I handed in my recently printed boarding pass to the young girl at the Ryanair check-in desk and placed the only bit of luggage I possessed on the scales, and waited with baited breathe as it was weighed. The limit for hand luggage was 10KG, she smiled and said, "That's OK!", and I inquired if she could tell how much did it actually weigh? "9.5KG, just under your permitted weight, you can now go through the gates and wait for the flight to be called". As I walked away from the check-in, I slowly and carefully emptied my jacket pockets of mobile phone, mobile phone adapter, Samsung Galaxy Tab (like an IPad - but half the size and quarter the price), the adapter for my Galaxy, my compact camera and leads and returned them back to their place, nice and safe in the hand luggage, I had just had weighed! It sure felt a lot heavier now.

Now my next hurdle was getting through security barrier where everyone gets scanned, I had planned ahead, and put all my metallic objects into my hand luggage, placed my hat, jacket on a tray next to my now practically bursting at the seams hand luggage, and then cautiously tip toed through the scanner and heard... nothing! Success! this was going well, until I realised I had left my shoes on the other side of the barrier! So sheepishly I got the security guard to stop the flow of passengers through the scanner so I could pick up my shoes and place the onto the conveyor belt to be scanned for perhaps hidden contraband or tightly packed explosives, but nobody said anything as I walked through the scanner for the second time to collect my freshly scanned shoes on the far side (funny how walking back through that scanner thingy draws everyones attention LOL!, pity the scanner doesn't knock out that man pong from well worn trainers!

Going through the gate to the duty free area of the airport, my senses were quickly attacked from all sides by fabulous wealth and opulence on display for the urban traveller to browse and buy before embarking onto their flight. As a non drinker and non smoker I quickly walked past all the pretty bottles of coloured water and vast quantities of packs of rolled up dried tobacco plants, and I quickly found myself in front of the one shop you always find in these airports, the one especially designed to catch most men of a certain age eyes, the electronics consumer store, full to the brim with all the latest must have gadgets, and even the option to buy cases for all these must be seen with gadgets! Not forgetting those ridiculously over-priced earphones, to use with all these gadgets. My eyes were practically starting to water at the sights of all this expensive plastic that would be worthless if dropped. My head happily intervened, I already had a bag, full suitable must haves, and really didn't require any more, for one thing, I'd have to pay extra to bring whatever I bought back, and I had just so many jacket pockets free!

I eventually found myself in the area of the airport everyone ends up in at least once during all their waiting around to board times, the food court! now all my visual senses were useless here!, except that is for my nose, my wife always said a way to my heart was through my nose and her cooking! I decided, as I hadn't had a breakfast at home, now was a good time to fill my belly before this epic journey begins in earnest. I decided on a Traditional English breakfast, egg, sausage, bacon, mushrooms, a fried tomato, baked beans and that ever so famous English side dish, hash browns? I followed this down with a nice small bottle of real orange juice, the one with the real bits of orange left inside to enhance the natural taste of the artificially created orange juice tasting liquid!

Feeling warm and with a full belly, I eventually found myself heading for the gate when my flight number came up. When I got there, I found loads of other passengers milling around waiting for news of the flight and the gate opening, I took a seat and waited. It was while waiting I saw that Ryanair had made two aisles from ropes leading up to the gate doors, one marked Priority booking passengers only, and the other (a much wider and larger aisle) labelled Other Passengers, why so large I wondered? Were Priority passenger thinner? yes that must be it, I thought.

When the tannoy announced that the gate was now open, could all the Priority passengers please make their way to the gate for boarding now, three people got up together with their large amounts of drinks and ciggy's and went to to meet the girl at the gate who checked their passports, lucky blighters! I thought, getting onto the transit coach first. After these three were safely on board out of harms way of the rest of us, the tannoy announced that the "Other" passengers could now make their way to the gate, which they all did, as I was listening to some Adele on my own must have MP3 player, I soon realised that I was the only one left in the lobby as I saw the last few walking through the gate! I quickly gathered my meagre belongings and found myself the last one to go through the gate and onto the transit bus to take us to our plane, it was funny seeing those three priority booking passengers with their faces pressed up against the bus windows near the front, as I stepped into the rear door of the bus. The journey to the plane was quick and when we pulled up next to the plane, the driver opened the front doors first to allow only the Priority passengers off first, followed in hot pursuit by the hordes of Other passengers, it was crazy watching them all funnelled into the flight of stairs at the front of the plane, it was during this stampeded, I noticed a second and as yet, empty flight of stairs leading up to a doorway at the rear of the plane, it seemed silly to ignore it, so I waddled over and started up the stairs, feeling a bit like some celebrity or famous diplomat of sorts, all by myself on this empty flight of stairs, then others in the horde saw what I had done and a few at first broke away from the main herd, then more and more, but I managed to reach the top of the stairs and calmly walked into the empty rear section of the plane before this horde reached my flight of stairs. Welcome aboard said the pretty flight attended and ushered me in, I could pick any of the empty seat, that stretched what seemed forever in front of me. In the distance near the front I saw the reason for the stagnant march up the first flight of stairs, the priority  passengers were busy standing in the middle of the aisle trying to get their hand luggage and large amounts of coloured water and packets of dried tobacco into the tiny overhead compartments. I happily strolled along one half of the plane past all the empty seats and eventually took one next to a window. So much for Priority booking I thought! Trying to fasten that ridiculously small belt around me made me wish, I'd never had that breakfast in the airport lounge earlier!


The flight, if you could call it that, was over before it began, it seemed, Newcastle to Dublin consists of basically two stages, take off to gain height, then descending to land, there was not much flying time to speak of. I do love looking at the fluffy clouds whilst the attendants art practising their semaphore signals to one another down the aisles, wish I could hear what she was saying, but my seat was directly above the two large stewardesses hair dryers, well they sounded like hair dryers.


and soon after a bump or two and a even louder screeching of brakes, we had finally landed in the land of the Leprauchauns, Dublin!

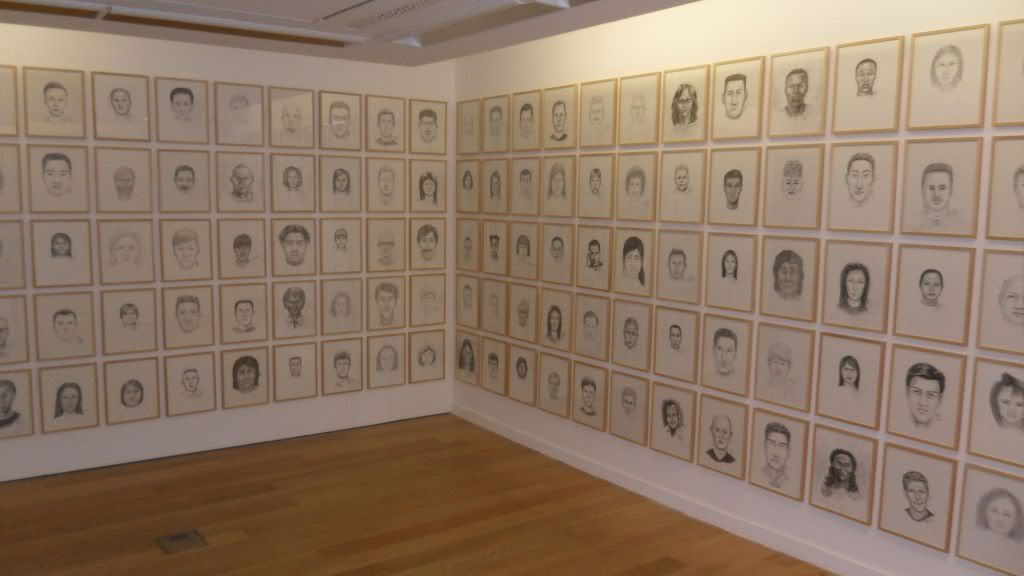
I got a taxi from the airport to my Hotel, but before reaching it, the Museum phoned and asked if I could come over earlier than planned as the Irish Press and TV crew wanted to film me sketching! So straight to the museum I went, where I met the lady who had organised my trip here, Maeve Butler, who signed me into the gallery and took me up a several flight of stairs into the main gallery, puffing, panting and red faced and out of breathe I stumbled into the main gallery to be met by 20 or so people who were waiting to meet me, Maeve introduced me as the sketch artist, and to my horror asked the waiting audience if they had any questions for me! Talk about a fish out of water, but eventually I get my breathe back and was able to answer all their questions with a few returned smiles and applause.


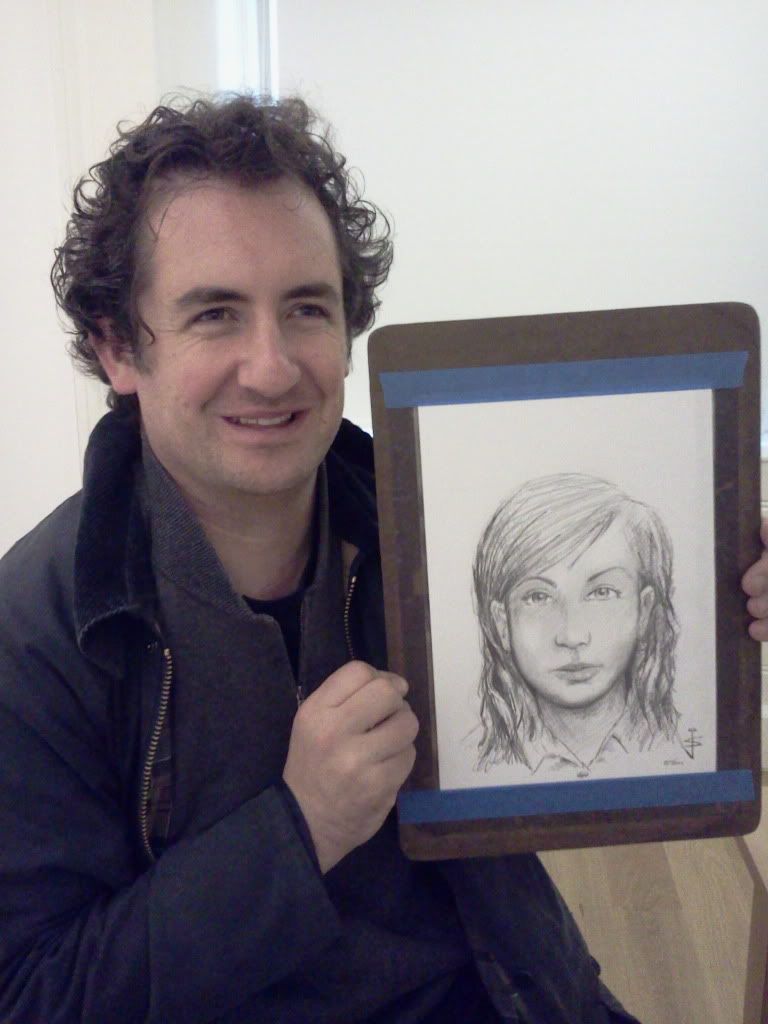
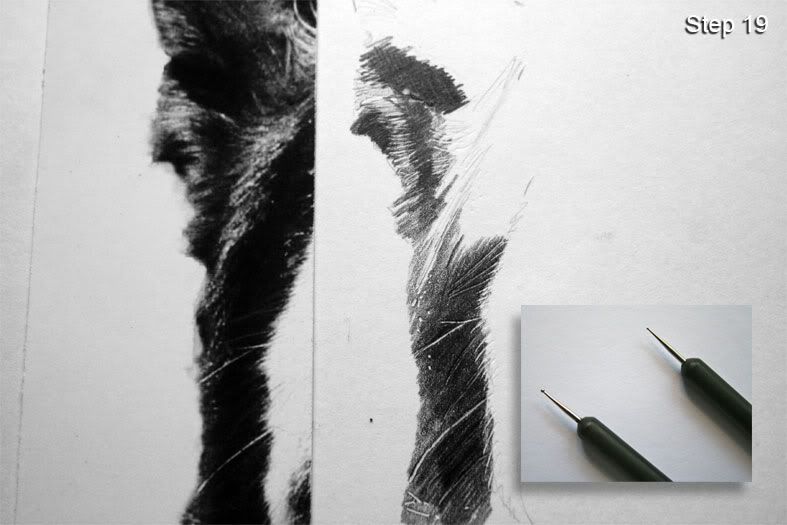
Maeve then showed me to the desk where I would be sitting and introduced the first person to describe to me their First Love, a member of staff called Stephen Taylor.


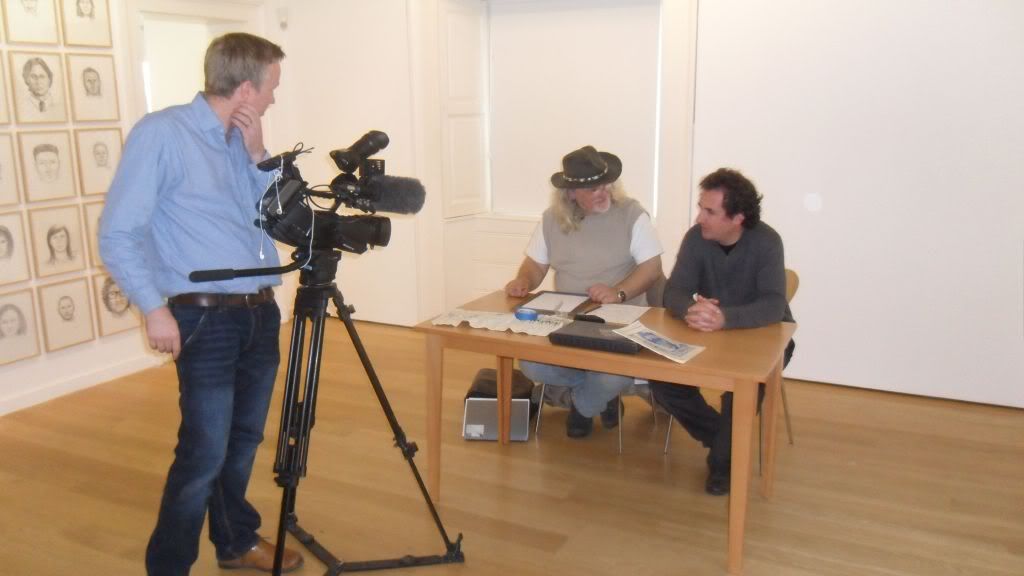
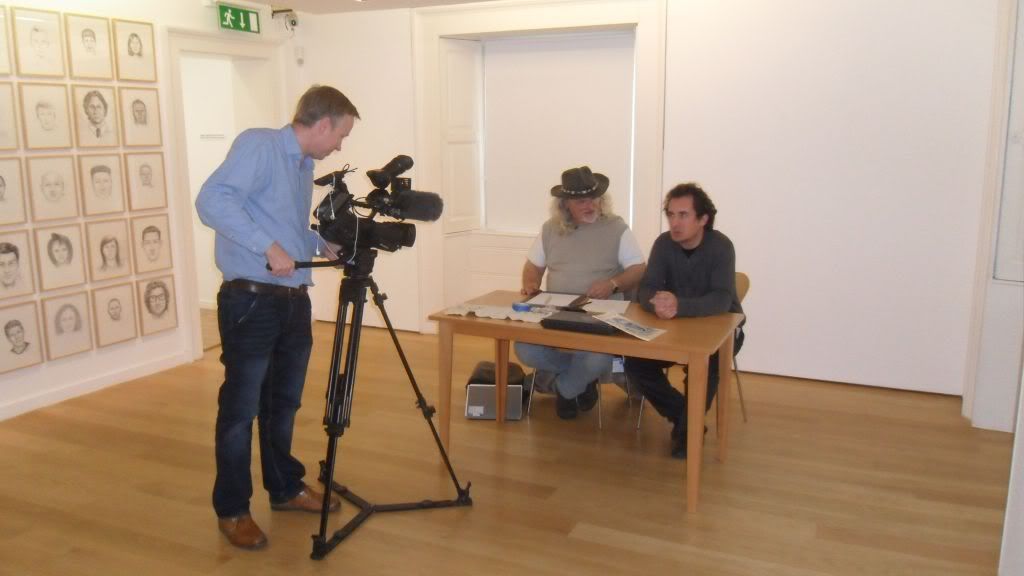
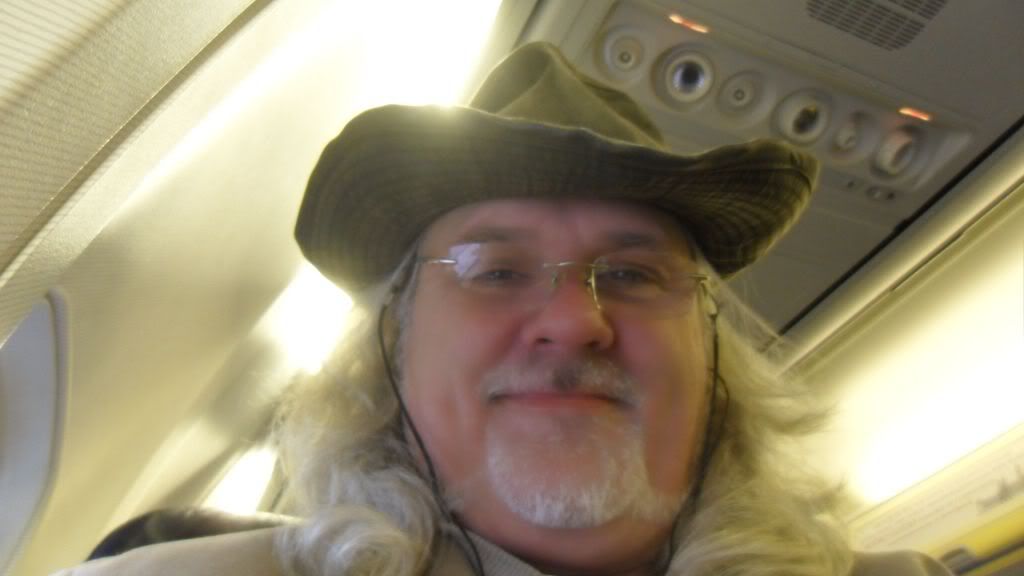
The film crew and director appeared out of the crowd and starting directing me on what he wanted for the TV footage, I hadn't even had time to take my hat off! If this was only the first few hours of the first day of my first trip, how on earth was I ever going to survive this ordeal!


Especially with seven more trips planned into my schedule over the next several weeks. The twenty or so years working as a Police artist took over, and soon I was back into my stride, asking Stephen about what he could recall and me sketching it all down just like I had done thousands of times before, this time in front of Irish RTE News cameras.


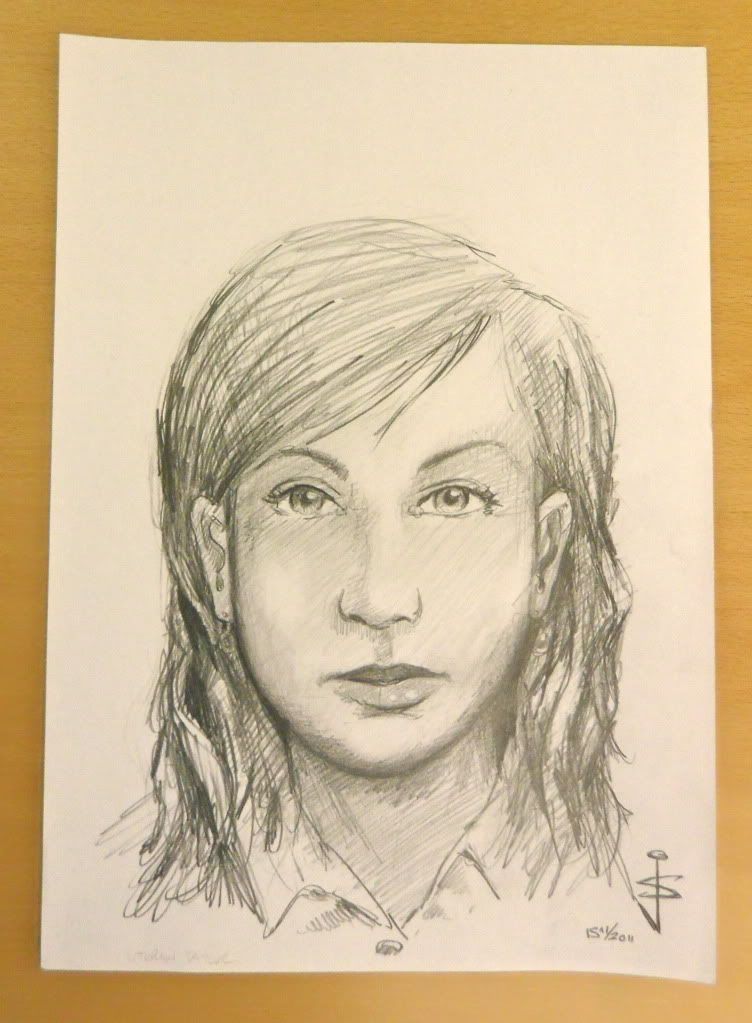
Stephen Taylor's "First Love"


After the film crew left, I stayed on a sketched a couple of more "First Loves" with some pre-selected guests chosen for this opening evening.


Thirty or so minutes later, I found myself in one of the great halls were we were giving wine and sparkling water to drink and were I met Rivane Neuenschwander, the Brazilian artist I was here to help in her latest exhibition, she is one of the most interesting people I had met so far, and thanked her for inviting me over to Dublin. When the glasses were empty, we were ushered into another beautiful hall, this time with perfectly laid out dinner settings, and personalised name cards for each guest, I have finally made the big time, I thought, as I searched around the tables looking for my name card, I soon started thinking, as I couldn't see my name anywhere, then perhaps I shouldn't  actually be here (wouldn't of been the first time I've put my foot in it!) but someone directed me to a table where my name was indeed beautifully hand written on a mustard coloured card, next to a Poet and one of the Museums residential spatial artists,  Victorrio (sorry,didn't get his last name) and opposite was Janice, one of the gallery staff and next to her the Brazilian Deputy Counsellor from the Brazilian Embassy in Dublin! The meal was delicious, sorry I can't tell you what it was, but I had what looked to be the smallest chicken in the world in a very delightful sauce. I never thought I'd go the distance, as I definitely do not mix in these kind of circles, but mix I did, and eventually, tired, fed, and a little worse for wear (that was definitely sparkling water I drink wasn't it?) I found my way to Kelly's Hotel in the centre of Dublin, fell onto the bed and finding a remote switched on the wall mounted TV to see MY UGLY face staring back at me, it was the RTE News with the article all about my day at the Museum! They must be starved for decent news I thought as I drifted off into a deep sleep, dreaming of Priority Passengers and faces of First Loves.....

Well, I seem to have been making news headlines in Dublin! Here is the news report of my first working visit to the Irish Museum of Modern Art. You'll have to scroll for about 20 min into the video.

On the night of the opening, Irelands National Broadcaster included a short piece on First Love.  You can watch the piece that appeared on the RTE Television News on 15 November at six and nine o'clock here..


You can also listen to the review of the show by Declan Long on the arts programme Arena, RTE Radio One, at 

Aidan Dunne, a critic here in Ireland has also written a piece which can be found here..

Sunday 13 November 2011

The Cottage


Medium: Acrylic
Paper: Arturo Stretched canvas
Size: 24″ × 15.5
Duration: Approximately 8-10 hours over two to three days.
This is a painting I’ve been itching to undertake for absolutely donkeys (well at least since I started painting in ernest), the source reference which I discovered inside a movie, called Ironclad, about a Templar Knight in England who rallies a few supporters to protect a maiden in her keep, a bit on the lines of the Magnificent 7 (but without the mexican villagers). About a third of the way into the movie, the knight and some of his followers seek the aid of a blacksmith, the scene just before they arrive, is of a beautiful white stone thatched blacksmiths cottage nestled amongst a tree line at the edge of a wood, fading off into a dusky misty morning. When I saw this scene, I knew I had to have a go at painting it, I could see the image in my head of this scene, but as a painting, all shades of green with the cow in a rustic red, oh yes, I just had to paint it, didn’t I?

Saturday 29 October 2011

The Stream


Medium: Acrylic
Paper: Stretched Canvas
Size: 510mm x 700mm (20″ × 27.5″)
Duration: 12 hours (over three days)
I’ve just finished this painting of The Stream, that I’ve been working on and off for the past week or so. For the reference, I used a photo I found on the internet (I think it is a local scene near me, (maybe Rothbury, Ingram Valley, Cheviots, or somewhere I know I’ve seen) this image, to me, just seemed to be crying out to be painted (haven’t you ever done this?) and as I was looking at the reference photo, I could see the painting in my head, really clearly (probably due to my years as a Police artist) , I could even see the colours I’d need and and thought this wee project was doable.

My Last Love


Medium: Pencil (leads F H 3H 4H 5H 6H 7H & 2B)
Paper: White acid free cartridge 140gsm
Size:  A4 size - 297mm x 210mm (11.7" x 8.3")
Duration: 2-3 hours approximately

This is what I set my students in my drawing class this week, they despaired at the brickwork, so as their teacher I had to show them how I would tackle this subject, and this is the result.

My first love (after the wife and family of course!) is, without question my art and in the ranking of things I love, gardening definitely comes last, hence the title.

The reference, is a photo I took of my garage/stables which I'm currently converting into my new art studio which you can read about here: http://www.redbubble.com/people/szymczuk/journal/7713676-converting-my-garage-stables-into-an-art-studio-part-1/ I decided that the evening light was casting some magnificent contrasting shadows onto the old brick wall and I just had to capture it (mainly before the walls get insulated).

Here are a few close ups of this finished piece:


Soon appearing in the Irish Museum of Modern Art

Now I know with some certainty, that I'm definitely the last person on the face of the planet to ever think I'd make it as any kind of modern artist, especially in any National Museum of Art....

...but, I've just finished brokering an astonishing deal with the Irish Museum of Modern Art in Dublin, who want my services as an sketch artist, two days a week over the next few months beginning the middle of November, flights and hotel accomodation included with a very generous flat fee!

I'll be taking part in Rivane’s Neuenschwander’s exhibition at the Irish Museum of Modern Art, where they want a retired police artist (me) to interview sketch members of the public's first love, live on stage. The finished sketches will be included in her exhibition. Rivane has been exhibiting all around the globe and will next appear in Dublin starting November after finishing in the States.

I've never ever been to Dublin, so I'm looking forward to going on several trips every weekend and into the New Year, I think maybe my wife and kids will be looking forward to some piece and quiet, but I'm sure they'll miss me (maybe a wee bit?)

So if you you are in Dublin, and want to get out of the rain (apparently it does this quite a lot - so will feel like home I suppose) during any of these dates, why not pop in, especially, if you want to see an old fish out of water floundering on stage! I just may need some support LOL.

Dates:
Tues 15th Nov 2pm - 5pm (Opening Day)
Wed 16th Nov 12 noon - 5pm

Then every weekend from:
Sat 26th Nov 2 pm - 5pm
Sun 27th Nov 12 noon - 5pm
Sat 03rd Dec 2 pm - 5pm
Sun 04th Dec 12 noon - 5pm
Sat 10th Dec 2 pm - 5pm
Sun 11th Dec 12 noon - 5pm
Sat 17th Dec 2 pm - 5pm
Sun 18th Dec 12 noon - 5pm
Sat 07th Jan 2 pm - 5pm
Sun 08th Jan 12 noon - 5pm
Sat 14th Jan 2 pm - 5pm
Sun 15th Jan 12 noon - 5pm
Sat 21st Jan 2 pm - 5pm
Sun 22nd Jan 12 noon - 5pm
Sat 28th Jan 2 pm - 5pm
Sun 29th Jan 12 noon - 5pm

Saturday 18 June 2011

Jed


Medium: Pencil – Pentel Mechanical Pencils (P203, P205, P207 and P209 – Leads (2B, 3H and F)
Paper: Goldline Bristol Board 220 gsm
Size: A3 420mm x 297mm (16.5 inch x 11.7 inch)
Duration: 7 hours

This is my drawing for the International Drawing Day 2011. I started this morning and have just finished it.

I’m really getting into using these embossing tools now, they are absolutely mint for creating fine medium and coarse fur, which this chap had in abundance.

THE SLIP AND SLIDE METHOD – with an introduction on Embossing techniques

THE SLIP AND SLIDE METHOD – with an introduction on Embossing techniques

Reference:
The source reference is from a photo I took of a dog called “Jed”, who I was commissioned to sketch and decided to create the artwork on June 4th, International Drawing Day.

Weapons of choice:
Pentel Mechanical Pencils (P203, P205, P207 and P209 – Leads (2B, 3H and F)
Pair of scissors (borrowed from our sewing box)
Electric eraser
Kneadable eraser
Derwent Essential Embossing tool set


Copious amounts of tea (Earl Grey?)
Digestive biscuits or Jacobs Cream Crackers (optional)

Paper:
Paper: Goldline Bristol Board 220 gsm
Size: A3 420mm x 297mm (16.5 inch x 11.7 inch)

Introduction:
This “The Slip and Slide Method* as I like to call it, is something I created for some of my drawing classes I used to teach locally, some of my students were always having problems trying to get the basic outline of whatever they wanted to sketch down on paper, invariably they were out of proportion, ran off the paper (we’ve all done that at least once right!) or the images were so small as to make working on them nigh impossible. So out of necessity I came up with this The Slip and Slide Method(it probably exists in some other form with some really classy name, but I don’t honestly know of it – that’s for the copyright lawyer folks out there!) probably started in my days as a Police Artist at New Scotland yard, back in the day (before computers and tinternet) when we used to use Photo-Fits to create faces, these were basically pieces of facial features in strip format, an police artist/operator would put together to compile a face of a wanted felon.

I guess I wanted something that any student could get an outline off their reference and onto paper, quickly and with the least bit of hassle involved. Something that would keep their work fairly tidy and comprehensible. Both left handed and right handed folks be able to use (yup, I’ve seen a left hander use this to their satisfaction).

If you know anything about me and my art (sketching and painting) I live by a simple law, “I draw (or paint) what I see”. So I decided that if I wanted to sketch an A3 sketch (20mm x 297mm or 16.5 inch x 11.7 inch) then I’d use a an A3 size reference (straightforward yes?), OK I realise that this is a big size and I’m lucky enough to have an A3 scanner printer at home, but if you are not as lucky to have one yourself, don’t panic, get to your your local photo-copy (xerox?) store to blow up your reference photo to the same size you are comfortable with sketching and in black and white. If we are going to sketch in black and white we really need to see the reference photo also in black and white (OK painters, you can use a colour reference, but may I just ask, why are you in my class? This is for pencil pushers only!)

We could go straight into Step 1 below, but I like to put my reference through the computer first and play around with filters and such in Adobe Photoshop (if your not into computers or Adobe, don’t worry, this bit is only for the computer nerdy artists out there… I scan in the original photo and after cropping it to a suitable size and proportion, I mask out the background clutter and erase it with only the dog itself on a white background (this helps you concentrate on your reference only – I suppose you could cut out the subject in your reference photo and get it photocopied on a white back drop).

I decided I wanted to give the bottom of the sketch something snazzy and cool looking, so I made a mask of zig zags that dwindles down to the bottom right hand side of the picture. I would love to be able to get quality source of beautiful zebras, cheetahs, leopards and tigers, but as they are few and far away from here in the UK, I thought I might use some kind of stripey effect to try and give my sketch something to make it stand out in the jungle of all those other beautifully sketched and painted dogs online. I’ve used this zig zag effect before and it seems to work Ok, especially with a dark dog.

After I’ve got the effect I want, I play around with the on board filters, high structure values, brightness and contrast values until I’m happy that the reference looks exactly how I want it to look like for my sketch, I print out an A3 size copy on photo paper (this or inkjet give you the best contrast in the printout).

Step 1

Here I have the reference printout I’m going to use for this sketch. It is the same size as the paper I’m sketching on. Which is going to make comparison whilst sketching easy to see.

Step 2

The first thing I do is to use the scissors (please little ones, have a grown up present or ask them to do this bit for you), and cut the reference printout into five fairly even strips or slips, vertically. See this is why I called the first part of my method slip, (and you folks in the back of the class, can stop giggling now!)

Step 3

I then position the strips onto the paper, roughly where I want the sketch to be placed, this makes sure your sketch is atheistically placed, where I think it looks best.

Step 4

Being right handed, I’m using the first strip on the left side (all you left handers can use the the last strip on the right hand side) I then keep this strip in place with one hand and use a pencil to mark the top width on the paper, just wee little marks only please, but enough so you can find them easily.

Step 5

I then mark the bottom width of the strip on the paper, again with two wee pencil marks, similar to what I did in the step above.

Step 6

Now the slip sliding part comes into action here, I’ll go slowly so those at the back can understand (George! please pay attention! and Barbara! take that chewing gum out of you mouth now girl!). I’m using my left hand to hold the first strip in place (checking that it is within my four marks on the sketch paper (left handed folks just do the reverse of what I’m showing you). Holding my pencil in my right hand leaning on the sketch paper and not on the reference strip just a few millimetres above the point of the ear I air draw the top peak of the ear, air drawing is like air guitar – not on the reference strip or on the sketch paper but just above where it is shown on the reference strip.

Step 7

I know it sounds stupid, but bear with me OK? When you are confident you know where the tip of the ear is going to be, keep your pencil hand steady on the sketch paper and with your left hand slip the reference away only enough to show the sketch paper underneath and now with your pencil hand (still steady on the sketch paper and the pencil hovering a few millimetres above the paper) pencil in lightly an ear tip on the sketch paper. Imagine the strip of paper is like a playing card, well just like a playing card, you can move it to an fro back onto the sketch paper (between the marks you pencilled in, remember those?) with a bit of practice, it is just like moving playing cards on a poker table (OK Marlene, Tarots cards are fine too!). Thus was born the name of my Slip and Slide method! So until I hear of a better title, this will have to do.

Step 8

With your reference strip back in place (between the pencil marks on the top and bottom) if you look at the right edge of the reference strip, you can see divisions on the reference where light begins and dark area end and so forth, well now we can mark some wee lines onto the sketch paper where these light and dark areas begin and stop, try and make the marks go in the same direction the divisions are going in (i.e. see those bits of white fur in the ears, and how they are kind of diagonally on the reference strip? well follow through on the sketch paper with your marks.

Step 9

Now using this remarkable low carbon footprint method of Slip and Sliding, use it to begin marking a few marks of the outline of the ear, it’s a bit like joining the dots, if you have enough of them, you can very quickly join them up to one another and the edge marks you’ve already placed down.

Step 10

Continue using the slip and slide method to track the outline of reference onto the sketch paper, when you get a bit faster (as all my students did) you can readily check some marks you’ve already placed down if it gets a bits wonky here or there.

Step 11

We now should have enough marks on the sketch paper for a fairly accurate outline the ear.

Step 12

I carry on down the reference strip to begin marking out the shoulders of the dog and the edges of this zig zag finish I want to sketch. You can see how I only marked the corners of each zig zag and then I simply sketched in between my marks in a zig zag fashion. My students found this is a real quick and dirty way to get the reference outline onto the paper, accurately and fairly quickly. Catherine! stop looking out of the window, and please try and pay attention!

Step 13

Going back to the ear, I sketch in freehand the structure of some of the inner fur and lighter sections, as it is only a small section of the whole sketch, you may find this easy to do as well, if not, then use the slide and slip method to help you get the structure lines you need.

INTRODUCING EMBOSSING TOOLS

Step 14
Okay now for the fun part you’ve all been waiting for, using your embossing tools (Barry!, please be careful! they are not swords!) in this part of the sketch, I’ve marked a few light hairlines and whiskers, that I want to make stand out, in the days of old, we pencil pushers had to either sketch around each whisker and hairline we wanted to stand out, making sure we didn’t sketch over it or perhaps we sketched in the fur and used a very thin edge rubber or electric eraser to make those whiskers right? Well, I’ve since found that these embossing tools are the bees knees for getting fine lines, whiskers and hairlines onto your sketch. The Derwent set comes with two embossers with a ball point tip on each end, one with a tiny and small tips and the other with a medium and larger tip (I’ll call them 1, 2, 3 and 4 – 1 and 2 being the tiny and small embosser and 3 and 4 the other medium and large).

Using the No.1 embosser, I press into the sketch paper (over the outline I’ve marked and joined up) I’m using the embosser like I would use a pencil (so you pencil pushers should be OK here), if I was using a pencil, I would press harder for a thicker line and lighter for a thin line, well I’m using the embosser the same way, for a thick whisker, I press hard going lighter for the thinner tip of the whisker.

Step 15

I use No’s 1, 2 and three for various thicknesses I want to achieve. On the heavy paper I’m using (220 gsm) it allows you to carve in beautiful grooves. I also use the tips of the embossers to place small hole indentations here and there, and those few odd speckles of white and light tone you find on your reference, (this, I find, is what makes my sketches seem photo-realistic) but please be careful not to puncture the sketch paper, which is why I like to sketch on a hard cutting mat or board.

Tip:
For a white whisker on your sketch, use the embosser on the sketch paper, for a shaded toned whisker, use the embosser on the pencilled line so that the pencil is inside the embossed groove.

Step 16

Once I have carved in enough whiskers and hairs I want standing out, I begin to hatch over the embossed area with a 2B pencil, keeping the pencil strokes fairly tight and always going over the grooves and not into them. You will notice as you hatch over in pencil the lines you embossed earlier, magically start appearing.

Step 17

The more you begin shading, you soon realise that you can easily carry on shading as normal, because every time you go over you embossed grooves, they stand out more and more, in the old days, you had to take great care to define the edges of whiskers as they sometimes collected more pencil along their edges when you try to keep them tidy, embossing (I find) lets you get on with getting your tonal shading spot on without worry about having to negotiate around those pesky whiskers all over a dogs face! You can easily pencil and hatch light or dark between whiskers you predefined with ease.

Step 18

Here you can see how I’ve feathered the dark fur into the white fur and begun to show a few hi-lights here and there.

Step 19

I’ve moved up to the base of the ear, and used Embossers No. 2 and 3 to cut in a few curved hi-lights and then gone over in a 2B pencil to blend those hi-lights into the darker fur.

Oh there goes the bell! well that’s all for now boys and girls, thank you for your time and please remember, to bring your work books into class tomorrow, and we will continue sketching Jed the dog.

Thank you for your time and especially your patience in reading this tutorial, I do hope you now have some kind of insight into my slip and slide method and introducing the Embossing tool. I will carry on with the full sketch later on.

Jan (happy sketching).